

When most homeowners begin daydreaming about a major property overhaul, their minds naturally gravitate toward the visible, aesthetic transformations. It is incredibly easy to spend hours agonizing over the perfect shade of veined quartz for the kitchen countertops, the exact width of wide-plank hardwood floors, or the ideal matte black finish for the bathroom fixtures. These are the elements you will touch and see every single day. However, the true success—and the long-term financial viability—of your project actually lies hidden behind the drywall. The invisible, structural upgrades you make while the walls are open will fundamentally dictate your home’s comfort levels, its resilience to extreme weather, and the exact dollar amount of your monthly utility bills for decades to come.
It is completely normal to feel a profound sense of decision fatigue and financial overwhelm when balancing these aesthetic desires with unseen, practical investments. The sheer volume of choices required to modernize an older property can be paralyzing. You might find yourself wondering if spending a significant portion of your budget on wires, insulation, and electrical panels is truly worth sacrificing the high-end appliances you originally wanted. This hesitation is valid, but ignoring the structural energy systems is a financial misstep that almost always results in regret.
Tackling your energy needs while the walls are already open and the framing is exposed is the single most cost-effective time to future-proof your property. Retrofitting these systems after the paint has dried is exponentially more expensive and logistically invasive. This comprehensive guide serves as your blueprint for navigating this complex journey. We will walk you through the precise, factual steps required to audit your baseline energy needs, upgrade your foundational electrical grid, seamlessly integrate renewable energy sources, and guarantee your property’s resilience with backup power. By the end of this guide, you will be equipped to make confident, data-driven decisions that will transform your house into a highly efficient, modern sanctuary.
Map Out Your Entire Renovation Vision First

Before a single sledgehammer swings or a single architectural drawing is finalized, you must establish an objective understanding of how your home currently performs. Upgrading a property without a baseline is essentially flying blind; you risk throwing money at the wrong problems while entirely ignoring the major sources of energy waste. You must approach this initial phase with the mindset of an investigator, relying on hard data rather than assumptions.
Conduct a Comprehensive Baseline Energy Audit
Do not rely on your own intuition to figure out where your home is losing energy. Drafts are not always obvious, and failing insulation is often entirely hidden. Your first step should be to hire an independent, professional energy auditor to evaluate your property.
-
The Blower Door Test: This is the cornerstone of any legitimate energy audit. The auditor will install a powerful fan in your exterior door frame, depressurizing the house to measure the exact rate at which outside air infiltrates your living space. This test removes all the guesswork from identifying drafts.
-
Thermal Imaging Scans: While the blower door is running, the auditor will use an infrared camera to scan your walls and ceilings. This scan will immediately reveal missing insulation, hidden moisture issues behind the drywall, and poorly sealed window frames, appearing as bright blue or purple spots on the camera’s display.
-
The Diagnostic Report: Following the audit, you will receive a highly detailed, prioritized list of recommendations. This document is invaluable. It tells you exactly which sealing and insulation tasks will yield the highest return on investment, allowing you to allocate your budget based on facts rather than guesses.
Align Your Aesthetic Goals with Your Energy Reality
Once you know how your home currently performs, you must map out exactly what you intend to add to it. A major home update usually involves adding significant modern conveniences, all of which require substantial power.
-
Audit Your Appliance Wishlist: Sit down and create a comprehensive list of every high-draw appliance you want. Are you switching from a gas range to a 36-inch induction cooktop? Are you adding a dual-compressor built-in refrigerator, a steam oven, an electric vehicle charger in the garage, or an electric heat pump for your HVAC system?
-
Coordinate the Timeline Early: Bring this exhaustive list of electrical load additions to your remodeling contractor the moment you hire them. Waiting until the framing is done to announce that you want a heavy-duty electric sauna in the master bathroom is a logistical nightmare.
-
Prevent Retrofitting Disasters: Coordinating your energy requirements and your appliance wishlist seamlessly during a broader residential remodeling project ensures that the necessary heavy-gauge wires, conduits, and circuits are run while the skeleton of the house is exposed. Failing to do this means you will inevitably have to pay someone to cut destructive trenches into your freshly finished, painted walls to run new cables later.
Fortify Your Foundational Power Grid

The harsh reality of modernizing an older property is that homes built even thirty years ago were not designed to support the electrified lifestyle we live today. If your home still relies on its original electrical infrastructure, it is highly likely that your foundational power grid is dangerously close to its maximum capacity. Before you can add smart appliances or renewable energy, you must ensure the heart of your electrical system is robust, safe, and legally compliant.
Calculate Your Future Amperage Requirements
You must treat your home’s electrical panel like a central nervous system. If you overload it, the entire system will shut down, or worse, become a severe fire hazard.
-
Assess the Current Main Panel: Locate your main breaker box and look at the master switch at the top. If the number on that switch says 100 amps, your home is critically underpowered by modern standards. Even a 150-amp panel will struggle to support the simultaneous use of central air conditioning, an induction stove, and an electric vehicle charger.
-
Plan for Heavy-Duty Upgrades: To truly future-proof your property, you need to budget for comprehensive service upgrades. For a moderately sized, fully electrified modern home, upgrading to a 200-amp main panel is the absolute minimum requirement. If your property is large, or if you plan to install a commercial-grade workshop, multiple electric vehicle chargers, or extensive exterior heating, you may need to escalate to a 400-amp service.
-
Understand the Utility Company’s Role: Upgrading your panel is not just an internal job. It often requires your local utility company to run a thicker, heavier physical wire from the street pole or underground transformer to your house. This coordination can take weeks or even months of bureaucratic permitting, which is why you must initiate this process on day one of your project.
Vet and Hire Specialized Power Professionals
When you are dealing with the main electrical feed of your home, there is absolutely no room for amateur hour. This is not the time to hire a general neighborhood handyman who claims they “know a little bit about wires.”
-
Demand Proof of Credentials: Before anyone touches your breaker box, demand to see their current state license, proof of bonding, and specialized liability insurance. A legitimate professional will happily provide this documentation without hesitation.
-
Focus on Code Compliance: You must strictly utilize certified electricians for this foundational work. The National Electrical Code (NEC) is incredibly strict and updates frequently. These professionals are trained to ensure that your new grid not only supports your load safely but also passes the rigorous municipal city inspections required to close out your building permits. Failing an electrical inspection will immediately halt your entire renovation timeline.
Integrate Renewable Generation While the Walls Are Open

Adding renewable energy to your home is one of the most powerful ways to take control of your monthly utility costs and reduce your environmental footprint. However, renewable systems require extensive, heavy-duty wiring that connects the exterior of your home to the interior electrical panel. Planning for this integration while the walls are open transforms a messy, complicated installation into a streamlined, invisible process.
Evaluate Roof Health and Sun Exposure Objectively
Before you commit to renewable generation, you must evaluate the physical realities of your property. Not every house is an ideal candidate for immediate rooftop power generation, and you need to assess your structural readiness honestly.
-
Assess the Shingles: Look critically at the remaining lifespan of your roof. If your asphalt shingles are curling, losing granules, or are more than fifteen years old, you must replace the roof before mounting anything to it. Installing heavy solar panels on a dying roof is a massive financial mistake, as you will have to pay a crew to detach the entire array, replace the roof, and then pay them again to reinstall the system just a few years down the line.
-
Analyze the Orientation: Determine the directional facing of your property. In the Northern Hemisphere, south-facing roof planes receive the most direct, prolonged sunlight, yielding the highest energy production. If your roof is heavily shaded by ancient oak trees or tall neighboring buildings, you may need to explore alternative options like ground-mounted arrays.
Pre-Wire for Future Smart Home and Battery Integration
Even if your current renovation budget does not allow for a massive, whole-home lithium-ion battery wall or a full rooftop array right now, you can still save yourself thousands of dollars in the future by executing one incredibly simple step today.
-
Run Empty Conduit Now: While the interior framing of your house is completely exposed, have your crew run thick, heavy-duty PVC conduit from your attic space directly down to your basement or garage, terminating near your main electrical panel.
-
Leave Pull-Strings for the Future: Instruct your local electricians to leave strong nylon pull-strings inside this empty conduit. When you are finally ready to install your renewable system or battery storage two or three years from now, the installation crew will not have to tear open your finished walls or run ugly metal pipes along the exterior of your beautiful home. They will simply tie their heavy transmission wires to the pull-string and pull them straight down through the hidden conduit in a matter of minutes. This forethought is the hallmark of a brilliantly executed renovation.
Seal the Envelope and Maximize Vertical Space

A robust electrical grid and renewable energy generation are virtually useless if your home cannot retain the air it works so hard to heat and cool. Creating a tightly sealed thermal envelope is paramount. This is especially true if your project involves expanding your livable square footage upward into the highest points of the house, where temperature extremes are the most severe.
Upgrade Insulation Before Closing the Ceiling
The single biggest source of energy loss in most older homes is the roof. Heated air naturally rises, and if your highest ceilings are not properly insulated, that expensive heat will bleed right through the roof deck and vanish into the winter sky. This phenomenon is known in building science as the “chimney effect.”
-
Implement Closed-Cell Spray Foam: To permanently halt the chimney effect, ditch the old, itchy pink fiberglass batts. Instead, invest in high-R-value closed-cell spray foam. When applied directly to the underside of the roof deck or between the wall studs, this material expands and hardens, creating a completely airtight, moisture-proof barrier that stops drafts and thermal bridging instantly.
-
Prioritize the Upper Levels: This step is absolutely critical if your remodel involves an attic finishing project. Transforming raw, unconditioned storage space into a comfortable bedroom, home office, or media room requires a flawless thermal barrier. Without top-tier spray foam insulation, that newly finished room will be unbearably sweltering in the summer and freezing cold in the winter, rendering your investment completely unusable for half the year.
Plan Zoned HVAC and Efficient Lighting
When you seal the envelope and add new living spaces, you must rethink how you condition and light those specific areas. Trying to force an old, centralized system to do a new job usually results in systemic failure.
-
Ditch the Old Ductwork: If you are adding a room on the top floor, do not attempt to extend your existing, struggling central air ducts all the way up. The air pressure will be incredibly weak by the time it reaches the top floor. Instead, plan for a dedicated, highly efficient ductless mini-split heat pump system for the new space. These systems provide hyper-targeted, zoned heating and cooling without the energy loss associated with leaky ductwork.
-
Design Cool-Running Lighting: The lighting you choose impacts your energy load and the ambient temperature of the room. Coordinate closely with your electrical contractors to design a layout utilizing low-voltage, cool-running LED recessed lighting. Ensure these fixtures are placed on dedicated, easily accessible circuits. Because LEDs generate virtually no heat compared to traditional incandescent bulbs, your new HVAC system will not have to work overtime to cool the room down when the lights are on.
Guarantee Resilience with Off-Grid Backup Systems
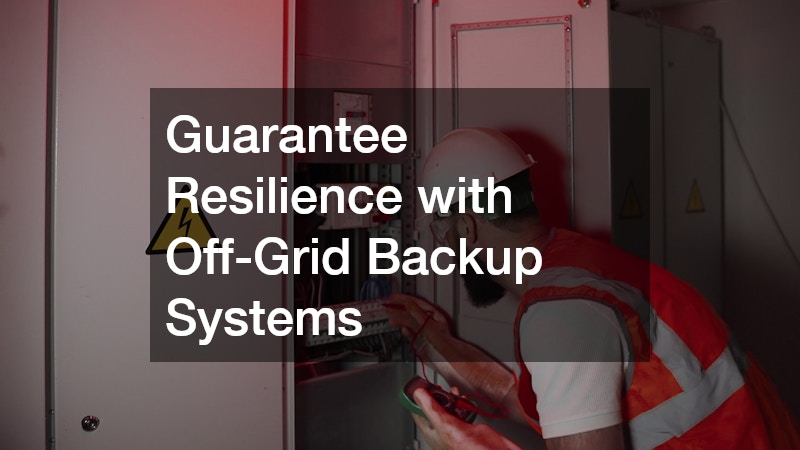
We live in an era of increasingly unpredictable weather patterns and aging municipal grid infrastructure. Rolling blackouts, severe winter ice storms, and summer hurricane disruptions are no longer rare anomalies; they are expected occurrences. A truly optimized, modernized home does not just operate efficiently when the grid is functioning; it also protects your family and your property when the grid completely fails.
Size a Standby Unit to Your Critical Circuits
When planning for off-grid resilience, you must move past the idea of dragging a noisy, gasoline-powered portable engine out of the shed with an extension cord. True resilience requires a permanently installed, fully integrated system.
-
Define Your Emergency Needs: Sit down in front of your newly upgraded electrical panel and make hard decisions. Do you need a massive, whole-home system capable of running three air conditioners and a double oven simultaneously during an outage? Or do you simply need a more affordable, targeted system that powers your “critical loads”—such as the refrigerator to prevent food spoilage, the deep well pump for fresh water, essential medical equipment, and the internet router for communication?
-
Require Professional Sizing and Integration: You cannot guess the size of the equipment you need. You must rely on professional generator services to calculate the exact starting wattage required to handle the massive surge of an HVAC compressor turning on. Furthermore, these professionals must safely install an Automatic Transfer Switch (ATS). This vital piece of equipment senses when the municipal grid drops, automatically isolates your house from the street to protect utility workers from dangerous back-fed voltage, and signals your backup power to turn on within seconds.
Establish a Reliable, Long-Term Fuel Supply Chain
A backup power system is only as reliable as the fuel source that feeds it. If your plan relies on you driving to a gas station during a state of emergency, your plan is critically flawed.
-
Evaluate Municipal Connections vs. On-Site Storage: If your property has access to municipal underground natural gas, you can connect your backup system directly to that line for an uninterrupted fuel supply. However, if you live in a rural area or a municipality where natural gas is unavailable, you must secure your own on-site fuel.
-
Bury a Dedicated Tank: While the heavy excavators are already on your property digging trenches for your renovation, have them dig a hole for a dedicated, securely buried, large-capacity fuel tank. This keeps the tank out of sight and protects it from the elements.
-
Automate Your Peace of Mind: Once the tank is buried and connected, set up an automated, remote-monitoring contract with a trusted propane delivery service. They will install a digital monitor on your tank that alerts their dispatch center when your fuel levels dip below thirty percent. This guarantees that your tank is constantly topped off year-round, ensuring your home will not freeze and your pipes will not burst during a multi-day winter grid failure.
Conclusion
The journey of remodeling a home is an exercise in balancing immediate gratification with long-term strategy. It is undeniably true that heavy-gauge wires, closed-cell spray foam insulation, and upgraded breaker boxes are not visually glamorous. You cannot show off a new electrical panel to your dinner guests the way you can show off a stunning marble backsplash. However, these invisible upgrades pay massive, compounding dividends in ways that cosmetic features simply cannot. They dictate your daily physical comfort, significantly boost your property’s resale value, and yield thousands of dollars in monthly utility savings over the lifespan of the home.
It is time to remove the hesitation surrounding these invisible investments. Ground yourself in the factual reality of homeownership: upgrading your property’s energy systems is a hefty upfront capital investment, but doing it proactively while your house is already under construction is the smartest, most cost-effective financial move you can make. The alternative is living in a beautiful shell that leaks money, struggles to power your modern life, and leaves you vulnerable to the next major storm.
Do not allow the excitement of paint swatches and tile samples to distract you from the foundational needs of your property. Challenge yourself to pick up the phone this week and schedule your baseline home energy audit. Secure the hard data you need, force yourself to look critically at your breaker box, and make the firm decision to fortify your home’s infrastructure before you sign off on any aesthetic blueprints. Your future self—and your future bank account—will thank you.