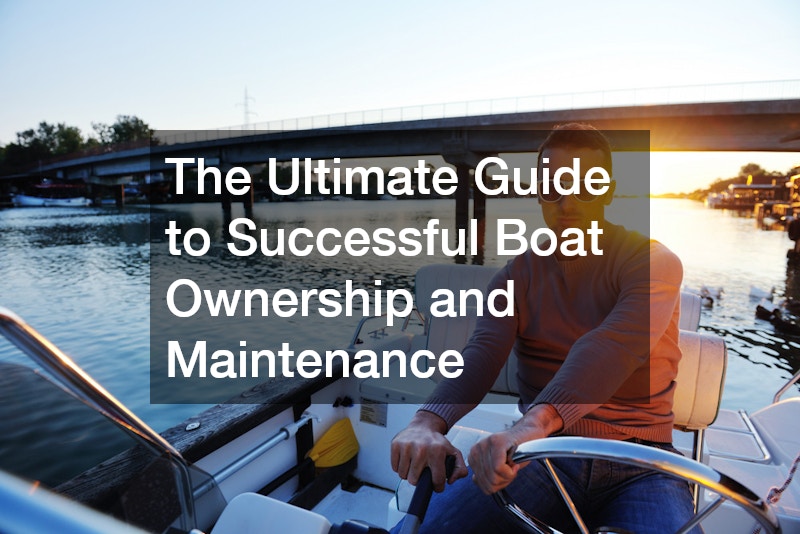

Picture this: a cloudless blue sky, the gentle sound of water lapping against a fiberglass hull, and the absolute freedom to cast off the dock lines and leave the terrestrial world behind. The boating lifestyle represents the pinnacle of leisure and adventure for many. It is an escape from the mundane, a way to connect with nature, and a passport to secluded coves and vibrant waterfront communities. However, this idyllic imagery often obscures a harsh, undeniable reality. A well-maintained vessel is indeed a boundless source of joy, but a neglected one is a relentless, exhausting drain on your time, energy, and finances.
Many first-time owners jump headfirst into a purchase mesmerized by the gleaming chrome and the promise of endless summers. Unfortunately, they often do so without a fundamental understanding of the strict, non-negotiable maintenance schedules required to keep a watercraft afloat. Boats exist in a fundamentally hostile environment. Continuous exposure to abrasive saltwater, microscopic marine growth, relentless ultraviolet radiation, and pounding waves accelerates wear and tear at a rate far exceeding that of an automobile. When the responsibilities of storage logistics, engine winterization, and electrical upkeep are ignored, the dream can quickly capsize into a logistical nightmare.
This comprehensive guide is designed to serve as your master manual for successful ownership. Whether you are contemplating your very first purchase or you are a seasoned captain looking to refine your maintenance routines, the insights provided here will help you protect your financial investment and, more importantly, maximize your precious time out on the water. We will systematically navigate through every critical phase of ownership, moving from the initial acquisition and rigorous pre-purchase inspections to storage solutions, mechanical upkeep, and meticulous exterior care.
By embracing these strategies, you will transform the overwhelming chores of maintenance into a rewarding discipline. A proactive approach is the difference between spending your weekends waiting for a tow and spending them cruising toward the horizon. Let us cast off and dive into the ultimate roadmap for keeping your craft seaworthy, safe, and stunning for years to come.
Phase 1: Acquiring the Right Vessel for Your Lifestyle

The journey to successful ownership begins long before you sign a title or hand over a check. The most critical mistake prospective buyers make is purchasing a vessel based purely on aesthetics or an idealized, unrealistic vision of how they will use it. Selecting the right craft requires absolute honesty about your budget, your mechanical aptitude, and your geographical realities.
Test the Waters Before Committing to a Purchase
It is incredibly easy to fall in love with the sleek lines of a deep-V center console, only to realize later that your family actually prefers the spacious, stable lounging area of a pontoon. Before making a massive financial commitment, you must spend a season practically testing different hull types and configurations.
-
Chartering for Experience: Spend your weekends trying out different vessels. Look into local boat rentals to secure a pontoon for a slow river cruise one weekend, and perhaps a bowrider for wakeboarding the next. This hands-on experience is invaluable. It quickly reveals whether you actually enjoy managing a larger vessel or if a nimble, easy-to-trailer skiff is more your speed.
-
Assess Your True Passenger Load: Calculate realistically how many people will consistently join you. Buying a twelve-passenger deck boat when it will usually just be you and a partner means you are paying for excess fuel, storage, and maintenance that you simply do not need.
-
Evaluate the Draft: Where will you be boating? If you live near shallow coastal bays, a deep-draft cruiser will keep you perpetually grounded. Conversely, a flat-bottom skiff will pound uncomfortably in choppy offshore waters. Match the hull design to your local hydrology.
Negotiate Smartly for Your Own Craft
Once you have narrowed down the exact style and size of the vessel that fits your life, the purchasing process begins. Navigating the sales floor requires patience, research, and a firm grasp of your budget limits.
-
Look Beyond the Sticker Price: The purchase price is just the entry fee. When visiting showrooms or walking the lots of regional boat dealers, you must factor in the hidden costs. Ask detailed questions about the cost of the trailer, the required safety gear packages, and the expected annual maintenance costs for the specific engine model you are considering.
-
Leverage Warranties: Negotiate for extended warranties on the outboard motor or the hull itself. A comprehensive warranty can save you thousands of dollars in the crucial first years of ownership while you are still learning the quirks of your new vessel.
-
Consider the Aftermarket: Sometimes, a slightly older, used vessel that has been meticulously maintained offers far better value than a brand-new model off the showroom floor. If buying used, request a complete log of all service records to verify the previous owner was diligent.
Phase 2: Conducting Rigorous Pre-Purchase and Annual Inspections
A boat is essentially a complex, floating ecosystem of fiberglass, high-voltage wiring, combustible fuel, and raw water plumbing. Assuming that a vessel is safe and sound just because the gel coat is shiny is a recipe for disaster. Rigorous, professional inspections are the only way to safeguard your life and your wallet.
Hire an Unbiased Expert to Find Hidden Flaws
Buying a vessel—especially a used one—without a professional inspection is a massive, unjustifiable financial risk. To the untrained eye, a freshly waxed hull looks perfect, but beneath the surface, catastrophic structural failures could be lurking.
-
The Power of Professional Insight: It is absolutely essential to hire an accredited marine surveyor before finalizing any transaction. These independent experts utilize specialized tools like moisture meters and thermal imaging cameras to peer beneath the fiberglass.
-
Detecting Delamination: One of the most common and expensive issues is hull delamination, where the layers of fiberglass separate due to water intrusion. An expert can tap the hull and listen for dull thuds that indicate structural rotting, saving you from buying a sinking ship.
-
Electrical and Plumbing Scrutiny: The inspection will also cover the vessel’s nervous system. The expert will trace the wiring to ensure it meets safety standards and check every through-hull fitting and seacock. A single corroded brass fitting below the waterline is all it takes to sink a vessel while it sits at the dock.
Evaluate the Vessel’s Balance and Seaworthiness
Beyond the mechanical and structural integrity of the craft, you must understand the physics of how the vessel interacts with the water, especially if you are purchasing a larger cruiser or planning to tackle open-ocean swells.
-
Understanding the Center of Gravity: A safe vessel requires a perfectly engineered balance. If previous owners have added heavy aftermarket equipment—like massive battery banks, oversized hardtops, or heavy auxiliary generators—high above the waterline, it can drastically alter the yacht stability, making the vessel dangerously prone to rolling in heavy seas.
-
Sea Trials are Mandatory: Never buy a vessel without a comprehensive sea trial. You need to feel how the boat handles a head sea, how sharply it turns, and how it responds when backing into a slip. Pay close attention to how the vessel rests in the water at idle; if it leans heavily to one port or starboard, there may be hidden water trapped in the bilge or unequal weight distribution.
-
Check the Scuppers and Drainage: During your sea trial, verify that the deck drains (scuppers) are appropriately sized and functioning. In rough weather, if a wave crashes over the bow, the vessel must be able to shed that immense water weight immediately to maintain its buoyancy and balance.
Phase 3: Securing Safe Storage and Protecting the Hull

How you store your vessel when you are not using it has a more significant impact on its lifespan than almost any other factor. Leaving a craft floating unattended in a wet slip year-round is an open invitation for nature to reclaim it. Strategic storage solutions are paramount.
Elevate Your Craft to Prevent Blistering and Algae
The water, while beautiful to cruise upon, is highly corrosive and filled with microscopic life eager to attach itself to your hull. Keeping your vessel out of the water when not in use is the ultimate protective measure.
-
The Threat of Osmosis: When a fiberglass hull sits continuously in water, moisture can slowly permeate the gel coat through a process called osmosis. This creates expanding blisters beneath the surface that eventually crack, exposing the raw fiberglass layers to rot and degradation. Repairing a blistered hull is an agonizingly slow and expensive process.
-
Battling Marine Growth: Even in freshwater, algae and slime will coat a submerged hull within days. In saltwater, barnacles will quickly colonize the bottom, creating massive drag that destroys your fuel efficiency and top speed.
-
Exploring Hoisting Solutions: To prevent these issues, dry-docking is highly recommended. Many owners look into boat lift sales to find a mechanical hoisting system that can be installed at their private dock or marina slip. These hydraulic or cable-driven cradles lift the entire vessel inches above the waterline, keeping the hull pristine and completely eliminating the need for toxic anti-fouling bottom paints.
Winterize and Shrink-Wrap Before the First Freeze
For those who live in climates that experience freezing temperatures, the end of the boating season triggers a critical protocol. Water expands when it freezes, and if that water is trapped inside your engine block or plumbing lines, the resulting ice will crack solid metal and shatter PVC pipes.
-
Engine and Plumbing Drain-Down: Every drop of raw water must be purged from the engine’s cooling system, the livewells, the air conditioning pumps, and the freshwater holding tanks. Non-toxic, marine-grade antifreeze must then be pumped through all these systems to protect the internal components from residual moisture.
-
Fuel Stabilization: Gasoline breaks down incredibly quickly. If left untreated over the winter, it will undergo phase separation, turning into a sludgy, gummy mess that will completely clog your fuel injectors in the spring. You must add a high-quality chemical stabilizer to the fuel tank and run the engine long enough for the treated fuel to cycle through the entire system.
-
Environmental Shielding: Once the mechanicals are safe, the exterior must be protected from ice, snow loads, and winter storms. Having the vessel professionally shrink-wrapped creates a tight, waterproof membrane. Ensure the wrapper installs proper ventilation vents to prevent trapped moisture from creating a moldy interior over the winter months.
Phase 4: Establishing a Non-Negotiable Engine and Systems Routine
The engine is the beating heart of your vessel. Unlike a car that can pull over to the shoulder if the engine dies, a mechanical failure on the water leaves you entirely at the mercy of the wind, the currents, and the weather. Proactive, non-negotiable maintenance routines are your only defense.
Flush the Engine After Every Saltwater Trip
Salt is the ultimate enemy of metal. When you run an outboard or an inboard engine in the ocean, corrosive salt crystals are sucked through the internal cooling passages. If left inside, they will quickly eat away at the aluminum block and exhaust manifolds.
-
The Flushing Protocol: Immediately upon returning to the dock or pulling the vessel onto its trailer, you must flush the engine with clean, fresh water. Connect a garden hose to the engine’s designated flush port or use a set of rubber “muffs” over the lower unit’s water intakes.
-
Time and Temperature: Turn on the water and let the engine idle. You must let it run for a minimum of ten to fifteen minutes. This allows the engine’s internal thermostat to open, ensuring that the fresh water circulates through every single internal cooling jacket, dissolving and pushing out the accumulated salt and sand.
-
Watch the Tell-Tale: While flushing, always monitor the “tell-tale” stream of water exiting the back of the engine. A strong, steady stream indicates the water pump impeller is functioning correctly. If the stream is weak or hot to the touch, you likely have a blockage or a failing impeller that needs immediate replacement.
Address Mechanical Issues Before They Compound
Marine engines operate under massive loads. Pushing a heavy fiberglass hull through water is akin to driving a truck up a steep hill constantly. Because of this continuous strain, minor issues escalate into catastrophic failures with terrifying speed.
-
Listen to the Engine: Develop an ear for your machinery. If you notice a slight hesitation upon acceleration, a new vibration in the deck, or a distinct drop in your usual top RPMs, do not ignore it. These are early warning signs of fouled spark plugs, spun propellers, or failing fuel pumps.
-
Professional Intervention: While changing your own oil and fuel filters is highly encouraged, do not hesitate to seek professional help for deeper diagnostics. Establishing a solid relationship with a certified technician who specializes in boat repair is invaluable. Having an expert regularly inspect your lower unit seals, check your engine alignment, and calibrate your shift cables is much cheaper than replacing a blown powerhead.
-
Keep a Spare Parts Kit: Always carry a robust emergency kit on board. This should include spare fuel filters, a replacement water pump impeller, extra spark plugs, a spare propeller with the necessary hub kit and wrench, and an assortment of marine-grade fuses and hose clamps. Being able to swap a clogged filter on the water can save your entire weekend.
Phase 5: Restoring and Protecting Exterior Surfaces
The aesthetic appeal of your vessel requires just as much dedication as the mechanical systems. The marine environment mercilessly attacks gel coat, stainless steel, and exterior wood. Without rigorous, methodical upkeep, a beautiful vessel will rapidly degrade into a chalky, faded eyesore.
Source High-Quality Materials for Surface Upkeep
Cleaning a boat is not like washing a car. The gel coat that forms the smooth outer layer of a fiberglass hull is porous. If you use harsh household detergents, dish soaps, or bleach, you will strip away the protective waxes, leaving the gel coat exposed to UV radiation, which causes heavy oxidation.
-
Specialized Cleansers: You must procure your cleaning agents from a dedicated marine deck supply distributor. Look for pH-balanced boat soaps that lift fish blood, salt, and grime without removing the underlying wax.
-
The Waxing Regimen: A heavy coat of marine-grade carnauba wax or a modern synthetic polymer sealant must be applied to the hull at least twice a year. This creates a sacrificial barrier against the sun and makes it significantly easier to wash off algae and waterlines after a long day on the lake.
-
Polishing Stainless Steel: Bow rails, cleats, and bimini top frames are constantly exposed to salt spray. Even marine-grade stainless steel will rust if neglected. Use a specialized metal polish to remove early signs of tea-staining and protect the metal from pitting.
Seal and Varnish Exposed Wood Elements
Classic vessels, and many high-end modern ones, feature beautiful wood accents. Teak swim platforms, mahogany gunwales, and custom wooden helms add unparalleled warmth and elegance, but they demand exhaustive labor to maintain their luster.
-
Combating UV Damage: Left unprotected, exotic woods will quickly bleach out to a dull, silvery grey under the harsh marine sun. Eventually, the wood will dry out, splinter, and rot.
-
Sanding and Prepping: Restoring brightwork requires immense patience. You must carefully sand the wood to remove old, flaking varnish, progressing from coarse grits to fine grits until the surface is exceptionally smooth. You may also need to utilize chemical brighteners to pull ground-in dirt and mildew out of the grain.
-
Oils vs. Varnishes: Depending on the application, you will need to choose the right finish. Teak swim platforms are usually treated with penetrating oils that repel water but do not create a slippery, hard shell. For decorative trims and rails, sourcing high-quality varnishes from a marine lumber specialist is essential. You must apply multiple, agonizingly thin coats of UV-resistant spar varnish—sanding lightly between each coat—to build up that deep, mirror-like, amber finish that defines classic marine woodworking.
Phase 6: Upgrading the Interior for Maximum Comfort
The interior of your vessel—whether it is an open cockpit or a deeply enclosed cabin—is where you and your guests will spend the majority of your time. If the seating is torn, the cushions are moldy, and the air is damp, the entire boating experience is compromised.
Select Weather-Resistant Seating and Upholstery
Standard upholstery materials will not survive a single season on the water. Wet bathing suits, spilled drinks, accidental drops of sunscreen, and relentless sun exposure demand heavy-duty, marine-specific solutions.
-
Upgrading the Helm and Lounges: Over time, vinyl seats will dry out, crack, and turn pink from bacterial growth trapped inside the foam. When it is time to upgrade, invest in specialized boat furniture designed specifically for the marine environment. Look for high-density, closed-cell foam that does not absorb water, covered in thick, UV-treated, antimicrobial marine vinyl.
-
Stitching Matters: When replacing cushions or captain’s chairs, pay close attention to the stitching. Ensure the manufacturer uses UV-resistant polyester or PTFE threads. Standard cotton or nylon threads will rot and snap within months under the sun, causing the seams of your brand-new seats to split wide open.
-
Protective Covers: The absolute best way to extend the life of your exterior upholstery is to keep it covered when not in use. Snap-on canvas covers or a full mooring cover will shield the vinyl from the sun and keep bird droppings and environmental fallout off your pristine white seats.
Optimize Cabin Airflow to Prevent Mildew
If your vessel has an enclosed cabin, a cuddy, or simply large storage lockers beneath the deck, moisture management is a constant battle. A sealed, dark, damp cabin is the perfect incubator for toxic black mold and destructive mildew.
-
The Necessity of Ventilation: You cannot simply lock the cabin door and walk away for a month. Stale air must be evacuated, and fresh air must be introduced. Consider installing passive cowl vents or, even better, solar-powered exhaust fans in the deck hatches to keep air circulating constantly, even when the battery banks are turned off.
-
Moisture Absorbers: Place chemical dehumidifying buckets or bags of desiccant crystals throughout the cabin, inside closets, and under the V-berth mattresses. These will actively pull humidity out of the air. Remember to empty the collected water regularly.
-
Keep the Bilge Bone Dry: The bilge—the lowest point inside the hull where water naturally collects—must be kept as dry as possible. A bilge full of stagnant water will evaporate upward, soaking the cabin fabrics and rotting the wooden bulkheads from the bottom up. Ensure your automatic bilge pumps are working correctly, and manually sponge out any residual water before closing up the vessel.
Phase 7: Reaping the Rewards of Diligent Maintenance
Maintenance can often feel like an endless, repetitive chore. However, the immense effort, the late afternoons spent waxing the hull, and the meticulous attention paid to the mechanical systems eventually yield an incredible return on investment. A well-maintained vessel shifts from being a burden to being a boundless source of adventure and peace of mind.
Expand Your Horizons Beyond Local Waters
When you possess absolute confidence in the structural integrity, the engine reliability, and the electrical systems of your craft, the way you use the vessel fundamentally changes. You are no longer restricted to staying within sight of the boat ramp.
-
Embracing Extended Journeys: A perfectly tuned vessel gives you the freedom to untie the lines and disappear for days or weeks at a time. You can begin planning those bucket-list sailing vacations down the coast, navigating the intracoastal waterways, or hopping between offshore islands. The anxiety of a potential breakdown is replaced by the thrill of exploration.
-
Self-Sufficiency on the Water: Knowing every inch of your vessel because you have maintained it yourself means you are prepared for the unexpected. If a belt squeals or a pump hums oddly while you are thirty miles offshore, you will immediately know what the sound is, where the component is located, and exactly how to fix it with the spare parts you meticulously packed.
Establish a Pre-Departure Safety Checklist
Even with a perfectly maintained vessel, human error remains a factor. To ensure that every outing is safe and stress-free, you must institute a strict, aviation-style pre-flight checklist before every single departure.
-
The Five-Minute Walkaround: Before anyone boards, check the weather forecast and the local tides. Inspect the mooring lines for chafe. Verify that the bilge is dry and the battery switches are engaged.
-
Safety Gear Audit: Physically touch and verify the location of every life jacket, ensuring there is one for every passenger onboard. Check the pressure gauges on the fire extinguishers. Test the VHF radio by requesting a radio check from the local marina or coast guard auxiliary.
-
Fluid and Function Check: Dip the engine oil to ensure proper levels. Check the power steering fluid. Finally, turn the key, listen to the engine roar to life, verify the cooling water is flowing, and check your fuel gauges. Once the checklist is complete, you can cast off with absolute confidence, knowing your vessel is ready for whatever the water brings.
Conclusion
The transition from a landlocked dreamer to a competent, confident captain is a journey paved with grease, fiberglass dust, and salt spray. Owning a vessel is not merely a financial transaction; it is the adoption of a highly technical, deeply rewarding lifestyle. It requires a willingness to learn the intricacies of marine mechanics, an eye for environmental vulnerabilities, and the discipline to execute maintenance routines even when you would rather be relaxing.
However, the return on this sweat equity is immeasurable. When you take the time to acquire the right hull, subject it to rigorous expert scrutiny, protect it from the elements, and treat its mechanical heart with respect, you forge an incredible bond with your craft. It ceases to be just a collection of parts and becomes a trusted partner in your adventures. You will find that the hours spent polishing the gel coat or changing the oil filter blur into the background, eclipsed by the memories of sunset cruises, the thrill of navigating open water, and the quiet peace of a secluded anchorage.
The water is waiting. Take out your calendar, schedule your next engine service, inspect your safety gear, and begin plotting your next course. By embracing the responsibilities of maintenance outlined in this guide, you guarantee that every time you leave the dock, you are destined for safe, spectacular horizons.